Skity: 2D Vector Graphic Library
Introduction
Skity is a 2D vector graphic render library writing in c++. The API follows the same pattern as Skia and implements the backend rendering by myself. Currently it can run on OpenGL and Vulkan context.
Build and Install
Option A: Build from source
Requirements
- CMake
- Freetype: If not present, font rendering will not working
- optional
- libpng: for png file decode
- libjpeg-turbo: for jpg file decode
- on windows ,need to set environment value:
JPEG_PREFIX=path to libjpeg installed directory
# fetch sources from github
git clone --recursive https://github.com/RuiwenTang/Skity.git
cd Skity
# Create build directory
mkdir build
cd build
cmake ..
make
make install
Option B: Using vcpkg
The port config is located in vcpkg-skity.
Using manifest mode
Add the following registry info to vcpkg-configuration.json as a git registry:
{
  "registries": [
    {
      "kind": "git",
      "repository": "https://github.com/RuiwenTang/vcpkg-skity.git",
      "baseline": "cf125cc8a08423432b70c240cfdd66e7002abbbf",
      "packages": [ "skity" ]
    }
  ]
}
And then add skity to vcpkg.json as a dependency:
{
  "name": "my-application",
  "version-string": "0.1.0",
  "dependencies": [
    "skity"
  ]
}
Using overlay-ports
Clone vcpkg-skity repo and pass a port-overlay to vcpkg:
vcpkg install skity --overlay-ports=/path/to/vcpkg-skity/ports/skity
Linking in CMake
In CMakeLists.txt, find and link skity:
find_package(skity CONFIG REQUIRED)
target_link_library(main skity::skity)
Brief Overview
To use Skity just include the header file in sources code.
#include <skity/skity.hpp>
Initialization
The first thing need to do is crerating a skity::Canvas instance.The code below shows how to do it using GLFW with OpenGL backend. The full code can look at gl_app.cc
GLFWwindow* window = glfwCreateWindow(800, 600, "Demo", nullptr, nullptr);

int32_t pp_width, pp_height;
glfwGetFramebufferSize(window_, &pp_width, &pp_height);

float density = (float)(pp_width * pp_width + pp_height * pp_height) /
                  (float)(800 * 800 + 600 * 600);

skity::GPUContext ctx{
    skity::GPUBackendType::kOpenGL,
    (void*) glfwGetProcAddress,
  };

auto canvas = skity::Canvas::MakeHardwareAccelationCanvas(800, 600,
                                                        density, &ctx);
- The first two parameters
widthandheightare the size information for target which is canvas will render into. - The third parameter is the pixel density of the current phisycal device.
- The last parameter is depends on what gpu context is used. For OpenGL context, just pass a
skity::GPUContext*and pass a function pointer for OpenGL Loading Function, since Skity not link OpenGL library in compile time, it will use this function to load needed functions in runtime.
Basic Usage
Shapes
// paint controls the color and style when geometry is rendered,
skity::Paint paint;
paint.setStyle(skity::Paint::kFill_Style);
paint.setColor(skity::ColorSetRGB(0x42, 0x85, 0xF4));
// create a rectangle shape
auto rect = skity::Rect::MakeXYWH(10, 10, 100, 160);
// draw a rounded rectangle
canvas->drawRoundRect(rect, 10, 10, paint);
The result of above code looks as follows:

Paths
skity::Paint paint;
paint.setStyle(skity::Paint::kFill_Style);
paint.setColor(skity::ColorSetRGB(0x42, 0x85, 0xF4));

// create path
skity::Path path;
path.moveTo(199, 34);
path.lineTo(253, 143);
path.lineTo(374, 160);
path.lineTo(287, 244);
path.lineTo(307, 365);
path.lineTo(199, 309);
path.lineTo(97, 365);
path.lineTo(112, 245);
path.lineTo(26, 161);
path.lineTo(146, 143);
path.close();

canvas->drawPath(path, paint);
By using the Path, lines and Bezier curves can be drawn. And the code will render a star shape as follow:

Stroke Bézier Curves
skity::Paint paint;
paint.setStyle(skity::Paint::kStroke_Style);
paint.setStrokeWidth(8);
paint.setColor(0xff4285F4);
paint.setStrokeCap(skity::Paint::kRound_Cap);

skity::Path path;
path.moveTo(10, 10);
path.quadTo(256, 64, 128, 128);
path.quadTo(10, 192, 250, 250);
canvas->drawPath(path, paint);
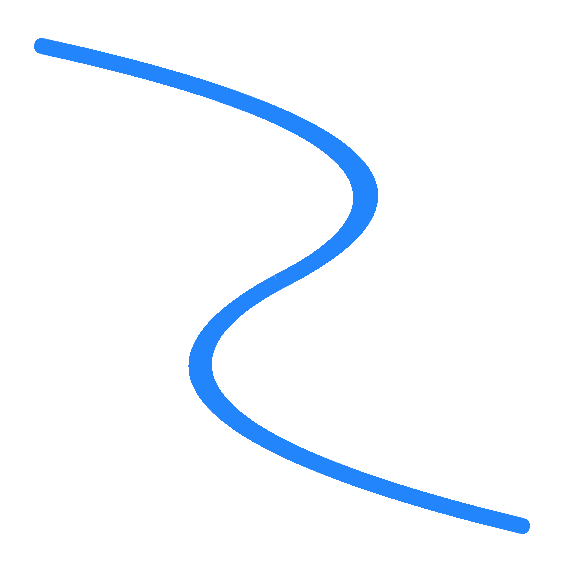
Paint can control line cap and stroke width, the above code shoud render a bezier curve like below:

More Examples
Can find the example code under example directory